Get Started with the Bins and Boxes App
 Silvia McIntyre
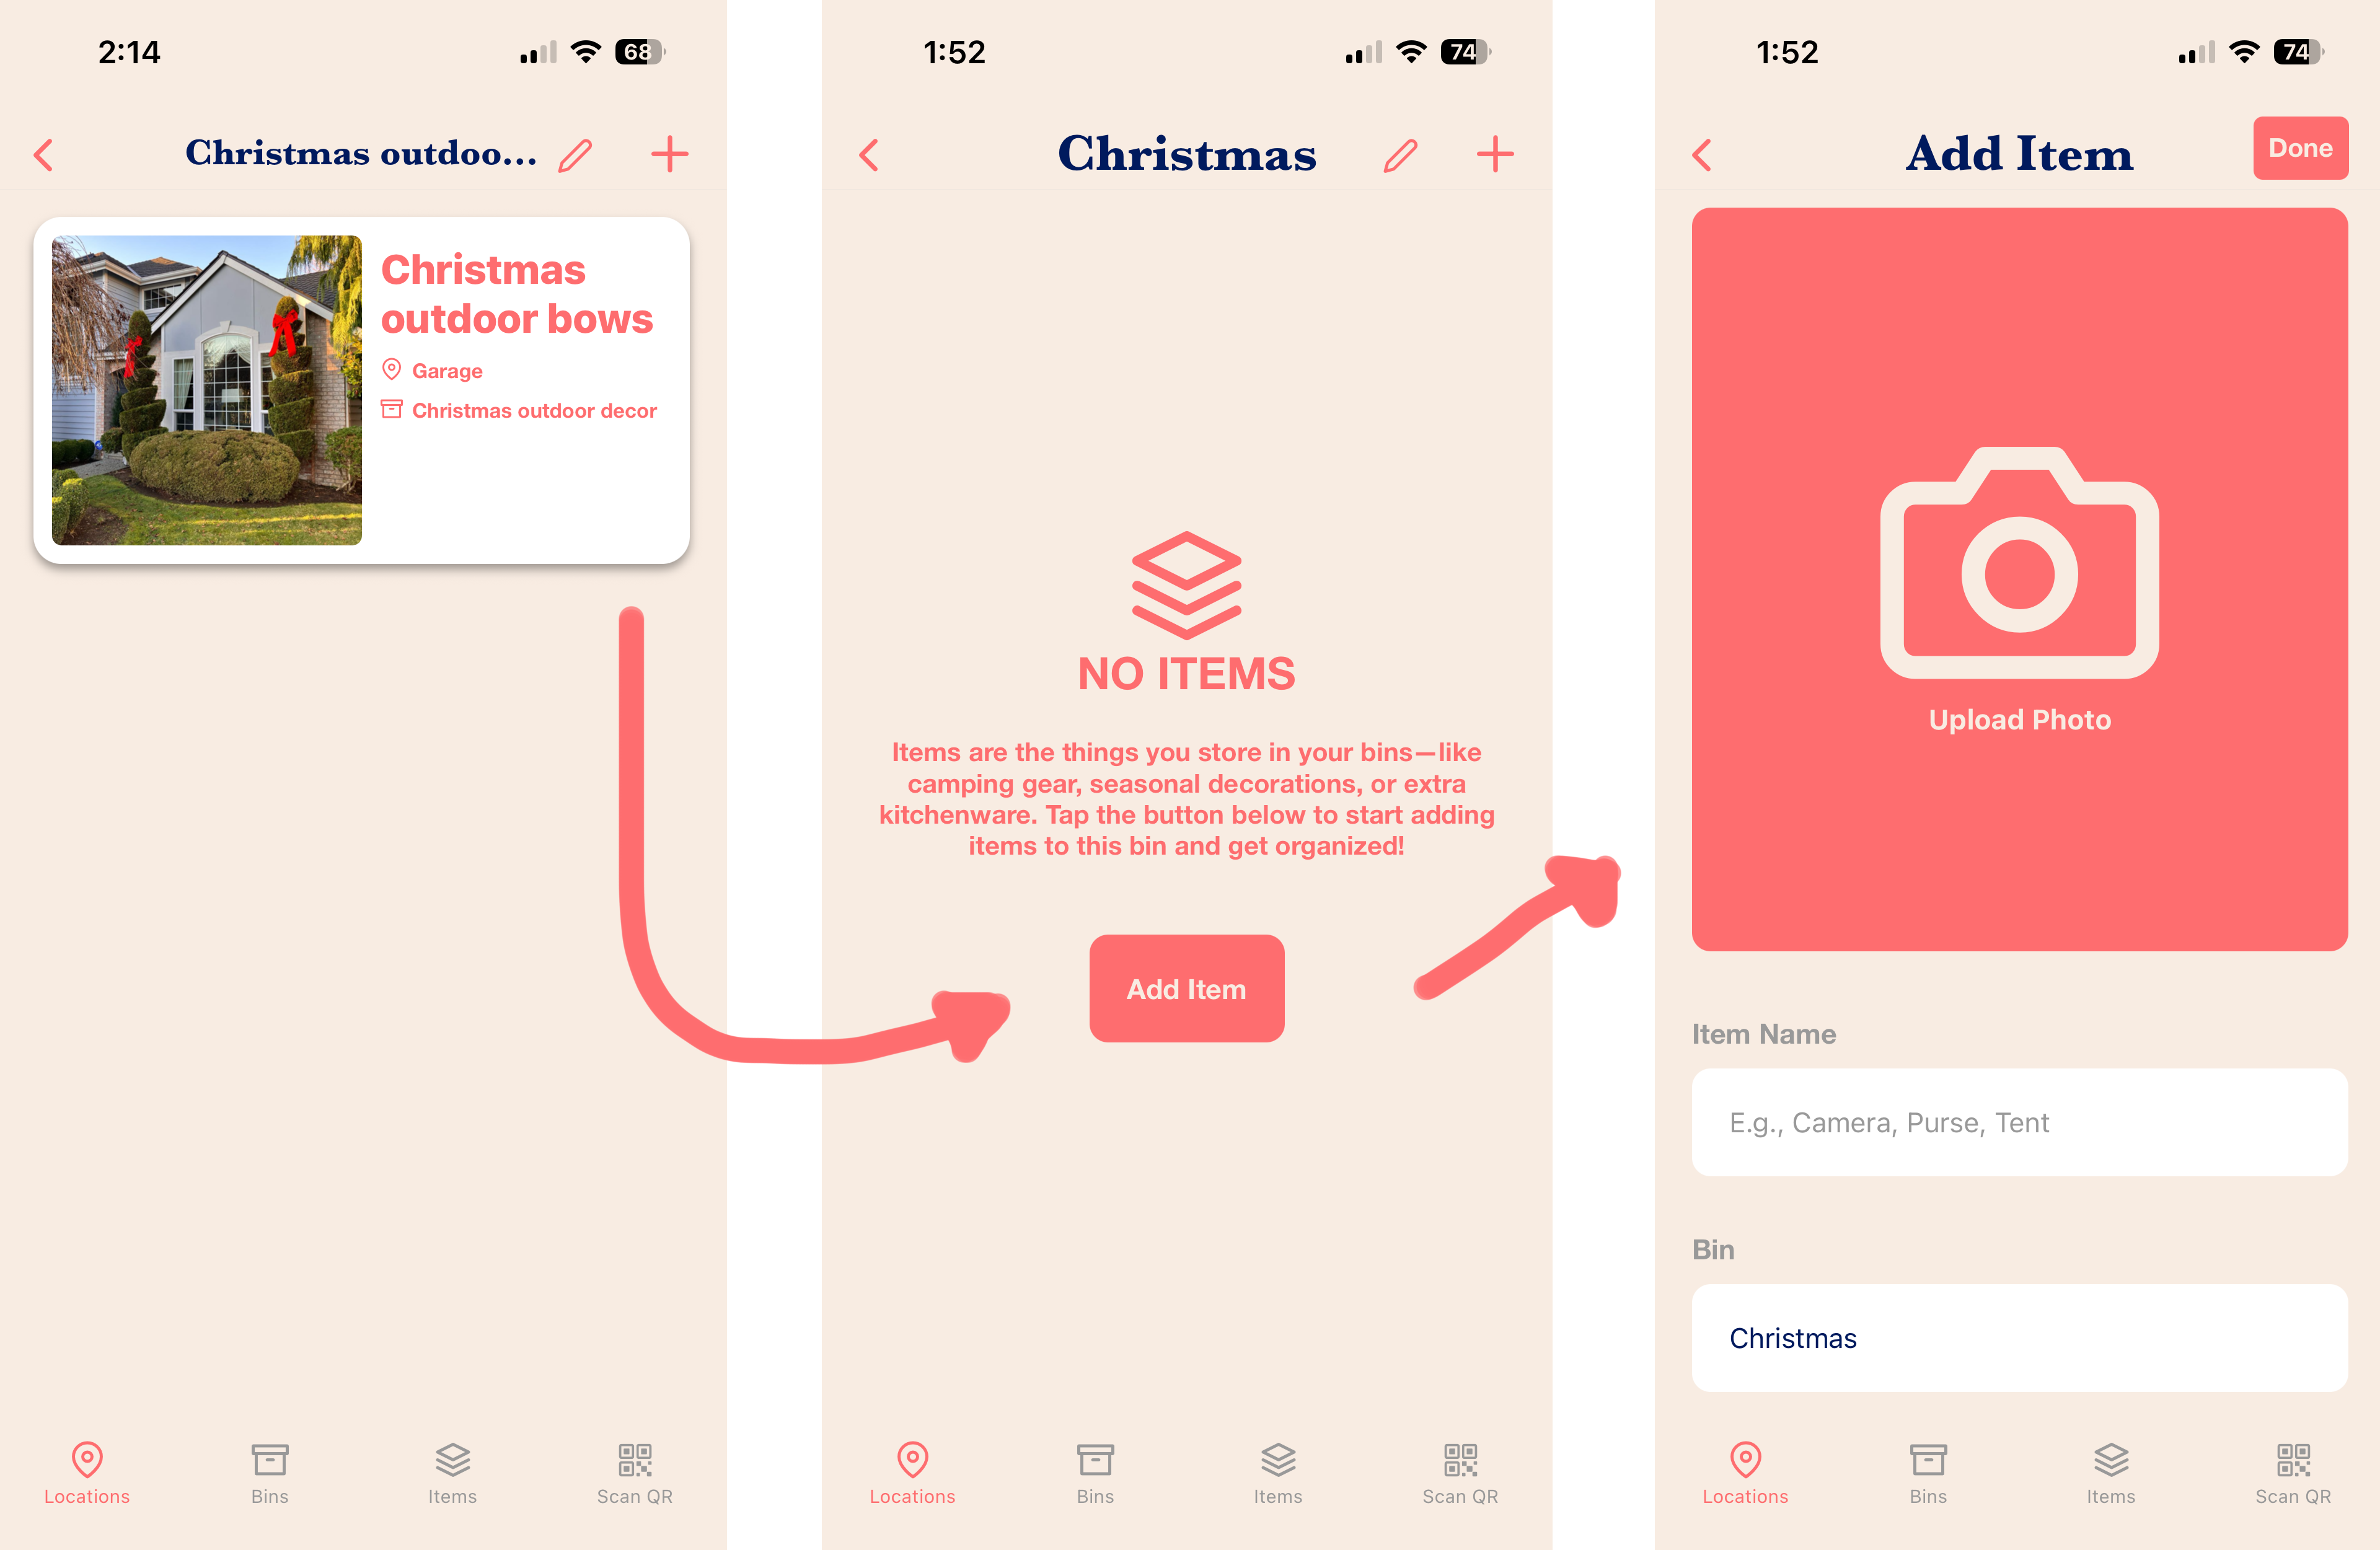
Welcome to Your Organized Life: How to Get Started with the Bins and Boxes App
You've downloaded the Bins and Boxes App—great choice! This step-by-step guide will transform your storage system from chaotic to organized.
Quick Navigation
- Create Your Account
- Set Up Your Locations
- Create Your First Bin
- Add Items to Your Bin
- View Your Bin List & Prepare to Print
- Print Your Bin Labels
- Apply Your Labels
- 🎁 Get Free Custom Labels!
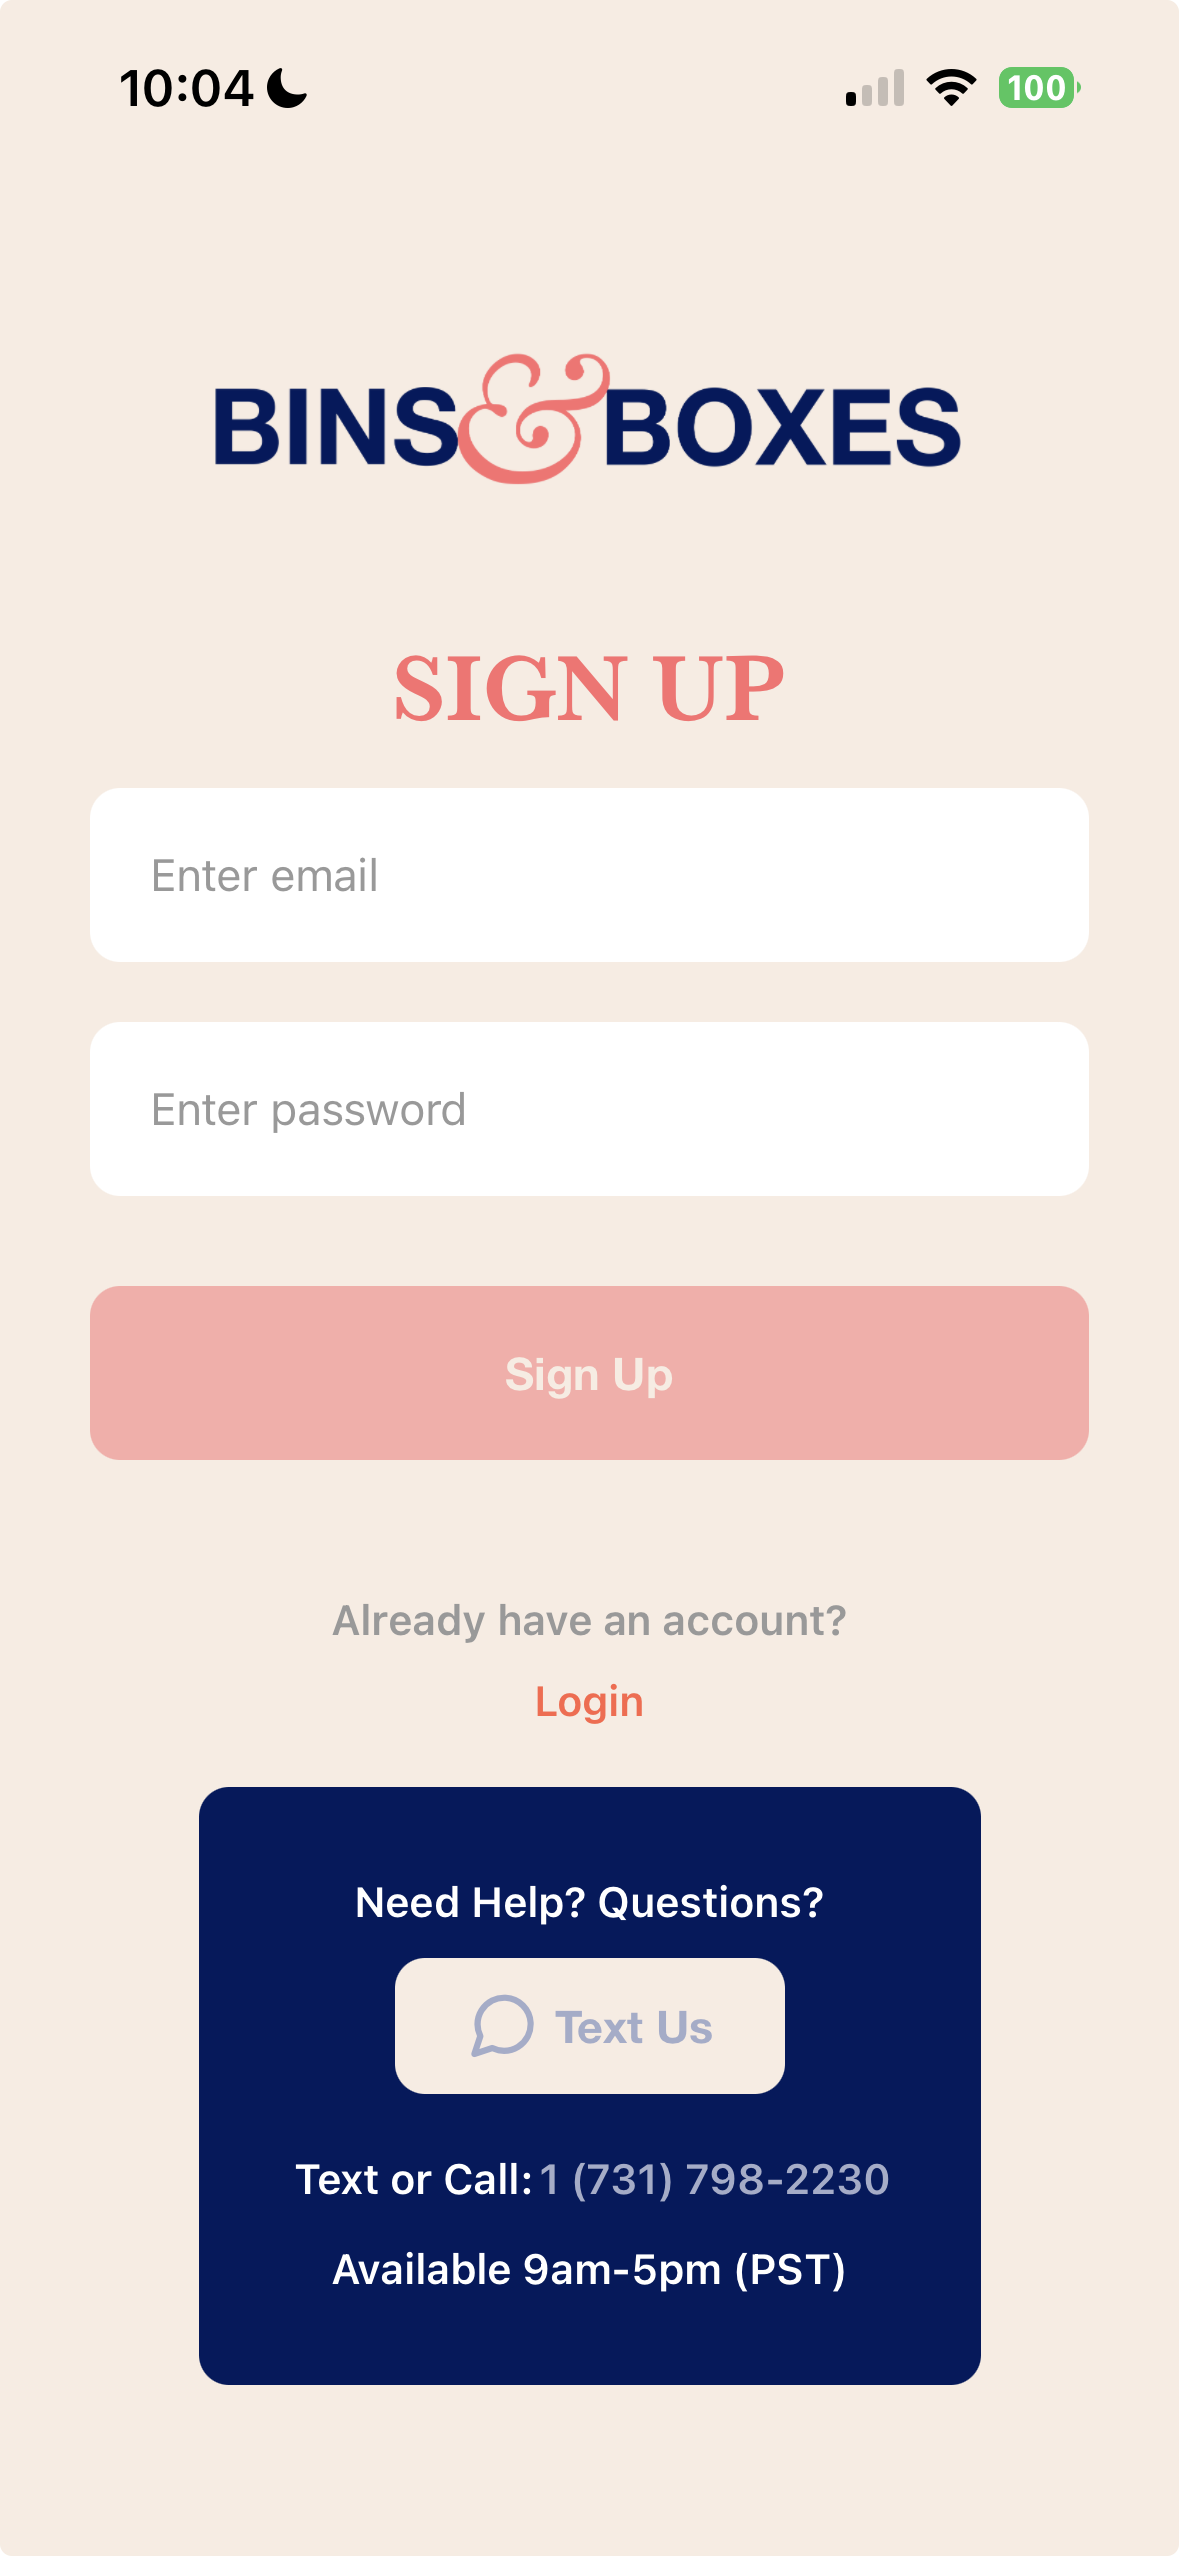
Step 1: Create Your Account
Create an account to save and access your bins, locations, and items across devices.
Step 2: Set Up Your Locations
Define where you're storing your bins—garage, attic, closet, or storage unit. These are your Locations.
- Tap 'Add Location' at the bottom of the screen.
- Enter the name (e.g., Garage, Holiday Closet, Craft Room).
- Tap "Done".
Step 3: Create Your First Bin
- Tap on your Location.
- Tap "Add Bin".
- In the Bin Setup Screen:
- Upload a photo of your bin.
- Choose a Bin Type (bin, box, drawer, cupboard, chest, or armoire).
- Add a Bin Label (like Christmas Decor or Camping Gear).
💡 Tip: Label the bin first and take the photo after it's packed—this makes it easy to recognize later.
Tap "Done" when finished.
Step 4: Add Items to Your Bin
- Tap your Bin.
- Tap "Add Item".
- Tap the camera icon to take a photo or choose one from your library.
- Adjust the image if needed.
- Tap "Choose".
- Enter a name (e.g., Red Tree Topper, ornament hooks).
- Tap "Done".
To add more items, tap the plus (+) icon and repeat.
Step 5: View Your Bin List & Prepare to Print
- After adding all items, take a picture of your bin if you haven't already.
- Tap the edit icon (pen at top) to reopen bin details and upload a photo of the finished bin. Tap "Done".
Tap the back arrow to return to the Bin List. From here you can view, edit, add new bins, or prepare for printing.
Step 6: Print Your Bin Labels
- In the Bin List, swipe left on any bin.
- Tap the printer icon.
- Select bins to print by checking them off.
- Tap "Print" at the bottom.
Choose a label size:
- Large (4x6)
- Medium (2x4)
- Small (2x2)
📝 Note: All selected labels print in the same size. For different sizes, print separately.
Confirm your printer and hit Print!
Final Touches: Apply Your Labels
Cut out your labels and stick them on your bins. Double-sided tape works great for flexibility, or use any adhesive you prefer.
✨ Pro Tip: Blank adhesive sheets in your chosen size offer a ready-to-peel option.
🎁 Bonus: Get Free Custom Labels!
We're offering 50 free custom 4x5 labels with your bin names pre-printed!
- Email us at info@binsandboxesapp.com after creating your bins.
- ⚠️ This is a one-time offer—create all your bins before requesting.
Important: These labels are extremely durable. For removable ones, use double-sided tape behind the backing.
Conclusion
You're organized and unstoppable!
The Bins and Boxes App keeps your belongings sorted and accessible. The combination of digital cataloging and physical QR labels creates a powerful organization system that grows with your needs.
Happy Organizing!
#binsandboxes #organization #storagetips #getorganized #declutter
Read our blog for more organization tips.